Introduction
In this lesson, you will learn how to change the page orientation, paper size, and page margins.
Page layout and formatting
Video: Page Layout in Word 2010
Optional: You can download this example for extra practice.
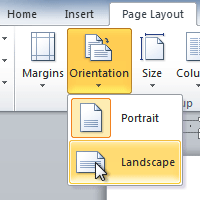
To change page orientation:
- Select the Page Layout tab.
- Click the Orientation command in the Page Setup group.
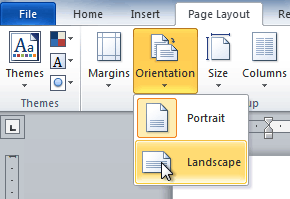
- Click either Portrait or Landscape to change the page orientation.
Landscape format means the page is oriented horizontally, while portrait format means it is oriented vertically.
To change page size:
- Select the Page Layout tab.
- Click the Size command, and a drop-down menu will appear. The current page size is highlighted.
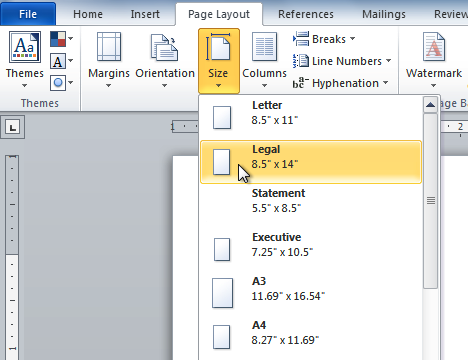
- Click the size option you want. The page size of the document changes.
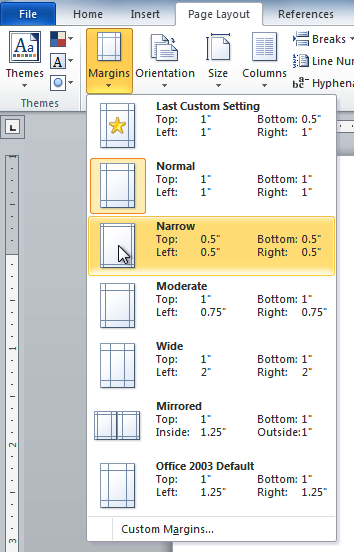
To format page margins:
- Select the Page Layout tab.
- Click the Margins command. A menu of options appears. Normal is selected by default.
- Click the predefined margin size you want.
To use custom margins:
- From the Page Layout tab, click Margins.
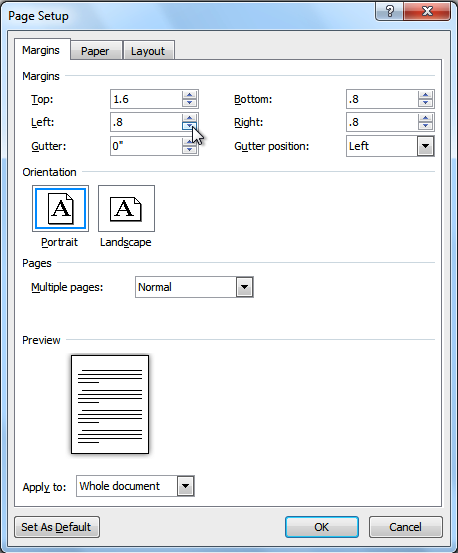
- Select Custom Margins. This will take you to the Page Setup dialog box.
- Adjust the margin sizes for each side of the page, then click OK.
You can use Word's convenient Set as Default feature to save all of the formatting changes you've made and automatically apply them to new documents. To learn how to do this, read our article on Changing Your Default Settings in Word.
The Page Setup dialog box
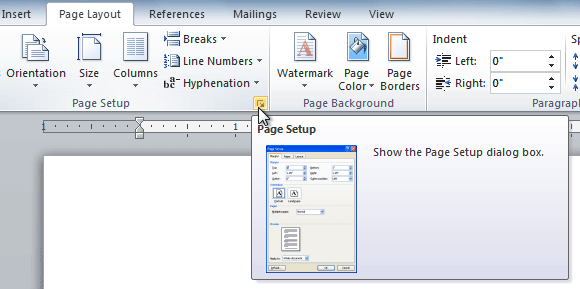
Previously, we showed you how to open the Page Setup dialog box from the Margins drop-down menu. As you become more familiar with Word, you may find that you want to use the Page Setup dialog box more often to fine tune the page margins and adjust other settings. To get there more quickly, you can use a shortcut that's conveniently located on the Page Layout tab.To open the Page Setup dialog box:
- Click the Page Layout tab.
- Click the small arrow in the bottom-right corner of the Page Setup group. The Page Setup dialog box will appear.
Challenge!
- Open an existing Word document. If you want, you can use this example.
- Change the page orientation.
- Change the paper size.
- Change the margins to narrow.
- Adjust the margins using custom margins.


0 comments:
Post a Comment