How to Create a Hollywood Sign Text Effect in Adobe Photoshop
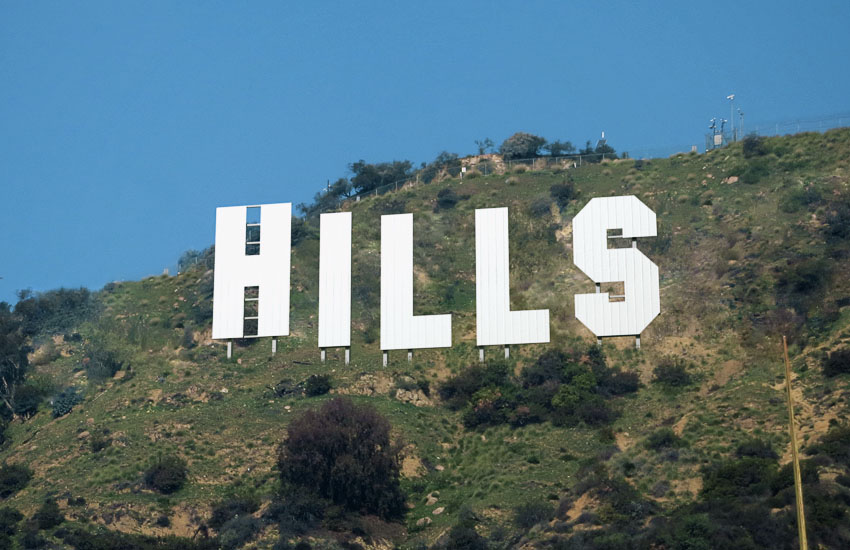
This tutorial will show you how to use Photoshop's healing and stamp tools, along with its 3D tools and settings, to create a Hollywood sign inspired text effect. Let's get started!
This text effect was inspired by the many Layer Styles available on GraphicRiver.
Tutorial Assets
The following assets were used during the production of this tutorial:
- Hollywood Hills font
- Background Image by chynsiah
- MetalPlatesPainted0146 Image 1 - Small
- MetalBare0207 Image 1 - Small
1. How to Create a Background Image
Step 1
Create a new 1250 x 850 px document, and then place the Background Image on top of the Background layer, rename its layer to BG Image, and resize it as you like.

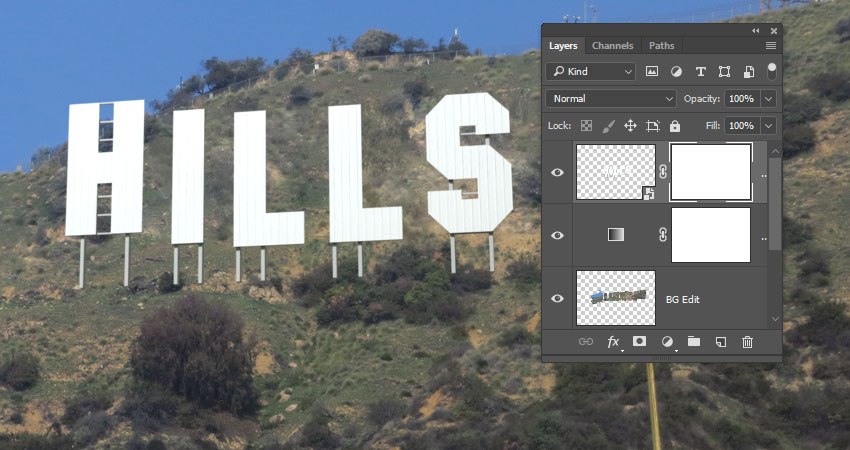
Step 2
Create a new layer and call it BG Edit.

Step 3
Pick the Healing Brush Tool, and set the Sample in the Options bar to Current & Below.
We'll be using this tool to get rid of the sign's letters in the background image.
So hold the Option key and click to sample an area that you want to replace a letter with.

Step 4
Now paint over the letter to remove it. Don't worry about getting perfect results, as we'll get back to the background after finishing the effect.

Step 5
You can also use other healing tools, or the Stamp Tool wherever needed, like the part where the hill meets the sky.
You can sample the trees at the top and paint over the ones to the left. This will create cleaner and more precise results.
Try the different tools, and pick the ones that give you the best result.

Step 6
Click the Create new fill or adjustment layer icon at the bottom of the Layers panel, and choose Gradient Map.

Step 7
Create the gradient fill using the colors
#433469 to the left, #5e6474 in the middle, and #d4b28a to the right.
Change the layer's Blend Mode to Soft Light, and its Opacity to 25%.
Save a copy of this file to use it later on for the lighting.

2. How to Create Text
Step 1
Create the text using the font Hollywood Hills. Set the Color to
#d9d9d9, the Size to 200 pt, and the Tracking to 100.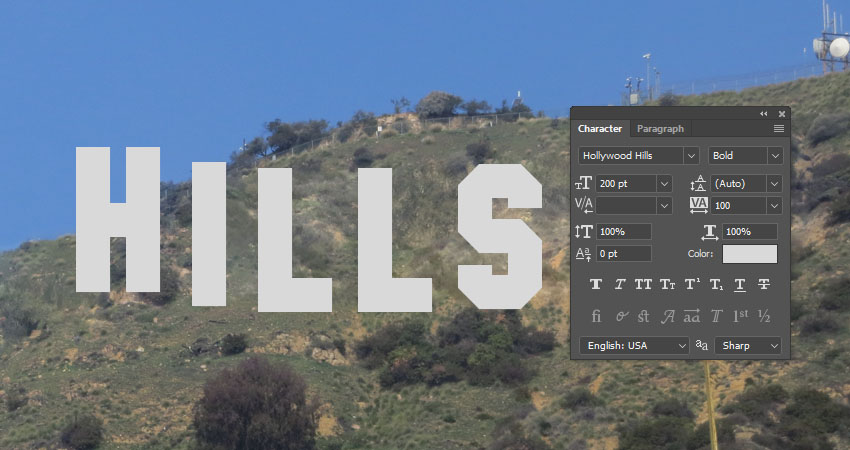
Step 2
Rename the text layer to Text, and then right-click it and choose Convert to Smart Object.

3. How to Create Line Shapes
Step 1
Pick the Line Tool, and set the Weight in the Options bar to 4.
Click-drag to create a line starting from the first letter's top edge, and extend it outside its bottom edge.
Press the Shift key to create a straight line, and the Space Bar to move the line shape as needed, before releasing the mouse button.

Step 2
Add vertical lines to the rest of the letters you have.
You can use the original image as a reference for the lines' placement, or come up with your own.

Step 3
Select all the line shape layers you have, and then go to Layer > Merge Shapes, and rename the merged layer to Vertical.
Pick the Direct Selection Tool and select the bottom anchor points of each of the lines, to align their bottom edges.

Step 4
Pick the Line Tool again, and set the Weight to 2.
Follow the same steps to create the horizontal lines, merge them in a Horizontal layer, and use the Direct Selection Tool to adjust any anchor points as needed.

4. How to Create 3D Layers
Step 1
For each shape layer you have, select it, and then go to 3D > New 3D Extrusion from Selected Path.

Step 2
Select all 3D layers you have, and then go to 3D > Merge 3D Layers.

5. How to Work With the 3D Scene
Step 1
To access the 3D mesh settings and properties, you’ll need to open two panels: the 3D panel and the Properties panel (both found under the Window menu).
The 3D panel has all the components of the 3D scene, and when you click the name of any of those, you’ll be able to access its settings in the Properties panel. So make sure to always select the tab of the element you want to modify in the 3D panel before you change its settings in the Properties panel.

Step 2
If you select the Move Tool, you’ll find a set of 3D Modes for it to the right of the Options bar.
When you choose one of those, you can then click and drag to perform changes (on the selected element in the 3D panel).
Use those modes to change the Current View into an angle you like.

6. How to Change the Extrusion Depth
Step 1
Select the Text mesh tab in the 3D panel, and then, in the Properties panel, change the Extrusion Depth to 0.5.

Step 2
Select the Vertical mesh tab, and change its Extrusion Depth to 7.

Step 3
Select the Horizontal mesh tab, and change its Extrusion Depth to 2.

7. How to Reposition the 3D Meshes
Step 1
Pick the Move Tool, and use the 3D Axis to reposition the 3D meshes so that you have the Text mesh in the front, the Horizontal mesh behind it, and the Vertical mesh at the back.
The arrows at the ends of the axis move the mesh, the part below them is used for rotation, and the cubes are used for scaling. The cube in the center is used to scale the object uniformly. All you need to do is click and drag the part you want.

Step 2
You can change the camera view, and zoom in and out, to better see how the meshes are positioned and make any necessary adjustments.

Step 3
Select all the mesh tabs in the 3D panel, and then click the 3D panel menu icon and choose Move Object to Ground Plane.

8. How to Create a Basic Material
Step 1
Select all the Text Material tabs, and use these material settings (the color values used are in RGB):
- Specular: 208, 206, 206
- Shine: 30
- Reflection: 3

Step 2
Select the Front Bevel, Extrusion, and Back Bevel Material tabs, click the Diffuse texture icon, and choose Remove Texture.

Step 3
Change the Diffuse Color to (217, 217, 217).

9. How to Apply a Bump Texture
Step 1
Select the Front Inflation Material tab, click the Bump folder icon, and choose Load Texture to open the MetalPlatesPainted0146 texture.

Step 2
Click the Bump texture icon and choose Edit Texture.

Step 3
Add an Invert adjustment layer, and then save and close the texture's file.

Step 4
If you can't see the texture on the letters, click the Infinite Light tab, and then use the Move Tool to move the light until you can see the texture.

Step 5
Select the Text Front Inflation Material tab if it's not selected, and then click the Bump texture icon and choose Edit UV Properties.

Step 6
Set both Offset values to 0, and the V/Y Tile value to 1. Then, increase the U/X value until you get a result you like.

Step 7
Select the Text Back Inflation Material tab, click the Bump folder icon, choose the MetalPlatesPainted0146 from the list, and use the same Front inflation Material UV values.

10. How to Create a Textured Metal Material
Step 1
Select the Vertical Front Inflation Material tab, and then use these settings:
- Specular: 188, 185, 185
- Shine: 50
- Reflection: 5

Step 2
Click the Diffuse texture icon, and then choose Replace Texture, and open the MetalBare0207 image.

Step 3
Click the Diffuse texture icon again, and choose Edit Texture.
Add a Levels adjustment layer, and then change the Gamma value to 2.55 and the Highlights to 220.
Save and close the file.

Step 4
Zoom in quite a bit to see the texture clearly on the vertical bars' front, and then edit the Diffuse texture's UV Properties.

11. How to Save and Re-Apply a Material
Step 1
Click the Material Picker box, and then click the pop-up menu icon, and choose New Material.

Step 2
Type in Bars Material for the Name, and click OK.

Step 3
Select the rest of the Vertical and Horizontal Material tabs.
Open the Material Picker, scroll down to the material icon you've just saved, and click it to apply it to the selected materials.

Step 4
Select the Vertical Mesh tab, change the Texture Mapping to Tile, and adjust its Extrusion Material UV Properties as needed.
Do the same for the Horizontal mesh.

Step 5
Make sure to adjust any other material settings, and keep in mind that you can always move the light whenever needed.

12. How to Adjust a 3D Scene's Lighting
Step 1
Before we work on the scene's lighting, it is better to choose the final camera angle.
You can temporarily hide the BG Edit layer to help you choose the angle based on the original letters, or just choose an angle you like.

Step 2
Select the Infinite Light tab, and then change the Intensity to 65% and the Shadow Softness to 30%.

Step 3
Move the light around until you like the scene's lighting, or you can click the Coordinates icon at the top of the Properties panel to use numerical values.

Step 4
Select the Environment tab, and then click the IBL texture icon, and choose Replace Texture to open the edited Background Image file you saved at the beginning of this tutorial.

Step 5
Set the Intensity to 50%, and move the light around if needed.

13. How to Render and Mask a 3D Scene
Step 1
Go to 3D > Render 3D Layer. The rendering might take a while, but you can stop it any time by pressing the Esc key.
Once the rendering is done, right-click the 3D layer and choose Convert to Smart Object. This will help prevent any accidental changes to the 3D layer.

Step 2
Pick the Brush Tool (B), and open the Brush panel (Window > Brush).
Choose the Spatter 24 pixels tip, and use these settings for the Brush Tip Shape and the Shape Dynamics tabs:

Step 3
Click the Add layer mask icon at the bottom of the Layers panel.
Step 4
Set the Foreground Color to
Black, make sure that the layer mask's thumbnail is selected, and start painting over the bottom part of the bars to mask them.
14. How to Use Adjustment Layers
Step 1
Add a Levels adjustment layer, clip it to the 3D layer, and then change the Output Highlights value to 245.

Step 2
Add a Gradient adjustment layer, and then create a Transparent to Fill Color gradient fill using the colors
#b3b3b3 to the left and #000000 to the right.
Change the Style to Radial and the Scale to 235%, and check the Dither box.

Step 3
Change the Gradient layer's Blend Mode to Soft Light.

Step 4
Add a Selective Color layer, and use these settings:
Reds
- Cyan: -30
- Magenta: 10
- Yellow: 10
- Black: -11
Greens
- Cyan: -20
- Magenta: -30
- Black: 10

Cyans
- Cyan: -20
- Magenta: -20
- Yellow: -20
- Black: -10
Blues
- Cyan: 25
- Magenta: -35
- Yellow: 15
- Black: -2

Whites
- Cyan: -30
- Magenta: -15
- Yellow: -25
- Black: 10
Neutrals
- Cyan: 3
- Yellow: 3
- Black: 10
Blacks
- Cyan: 5
- Magenta: 3
- Yellow: -2
- Black: 10

Step 5
Add a Vibrance adjustment layer, and then change its Blend Mode to Color so that it doesn't affect the luminosity.
Then, change the Vibrance to 70 and the Saturation to -20.

Step 6
Add a Brightness/Contrast adjustment layer, change its Blend Mode to Luminosity so that it doesn't affect the color, and change the Contrast to 15.

15. How to Fix a Background Texture
Step 1
After adding all the adjustment layers, now is a good time to go back to the BG Edit layer, and fix any issues with the modified background.
Check any areas that don't blend with the original background well or don't seem to fit, and use the Healing and Stamp Tools to fix those areas.

Step 2
Once you're done, create a new layer, and then press the Option-Command-Shift-E keys to create a stamp.
Rename the stamp layer to High Pass, and convert it to a smart object.

Step 3
Go to Filter > Other > High Pass, and change the Radius to 1.

Step 4
Change the High Pass layer's Blend Mode to Soft Light.

Congratulations, You're Done!
In this tutorial, we used some healing tools to remove the Hollywood sign letters from the background.
Then, we created some text, converted it into 3D meshes, and changed a couple of mesh settings to create the main text effect.
After that, we created the materials, adjusted the lighting, and rendered the scene. Finally, we used a bunch of adjustment layers to finish off the effect.
Please feel free to leave your comments, suggestions, and outcomes below.


0 comments:
Post a Comment